群晖Docker部署私人笔记软件Joplin
群晖Docker部署私人笔记软件Joplin
如何在群晖里面部署Joplin Server
群晖在升级DSM 7.2后,Docker也升级成了Container Manager,简单来说就是支持docker compose了,变的更加的好用了,部署服务更加方便了,你只需要直接拷贝下面的配置文件到Container Manager里面就可以直接部署Joplin Server了。
在开始之前我们先开启群晖的NTP服务,不然就可能会遇到下面的报错。
2023-07-24 18:51:01: App: Starting server v2.7.4 (prod) on port 22300 and PID 7...
Error: The device time drift is 64674ms (Max allowed: 2000ms) - cannot continue as it could cause data loss and conflicts on the sync clients. You may increase env var MAX_TIME_DRIFT to pass the check, or set to 0 to disabled the check.
    at /home/joplin/packages/server/src/app.ts:260:11
    at Generator.next (<anonymous>)
    at fulfilled (/home/joplin/packages/server/dist/app.js:5:58)
    at processTicksAndRejections (node:internal/process/task_queues:96:5)
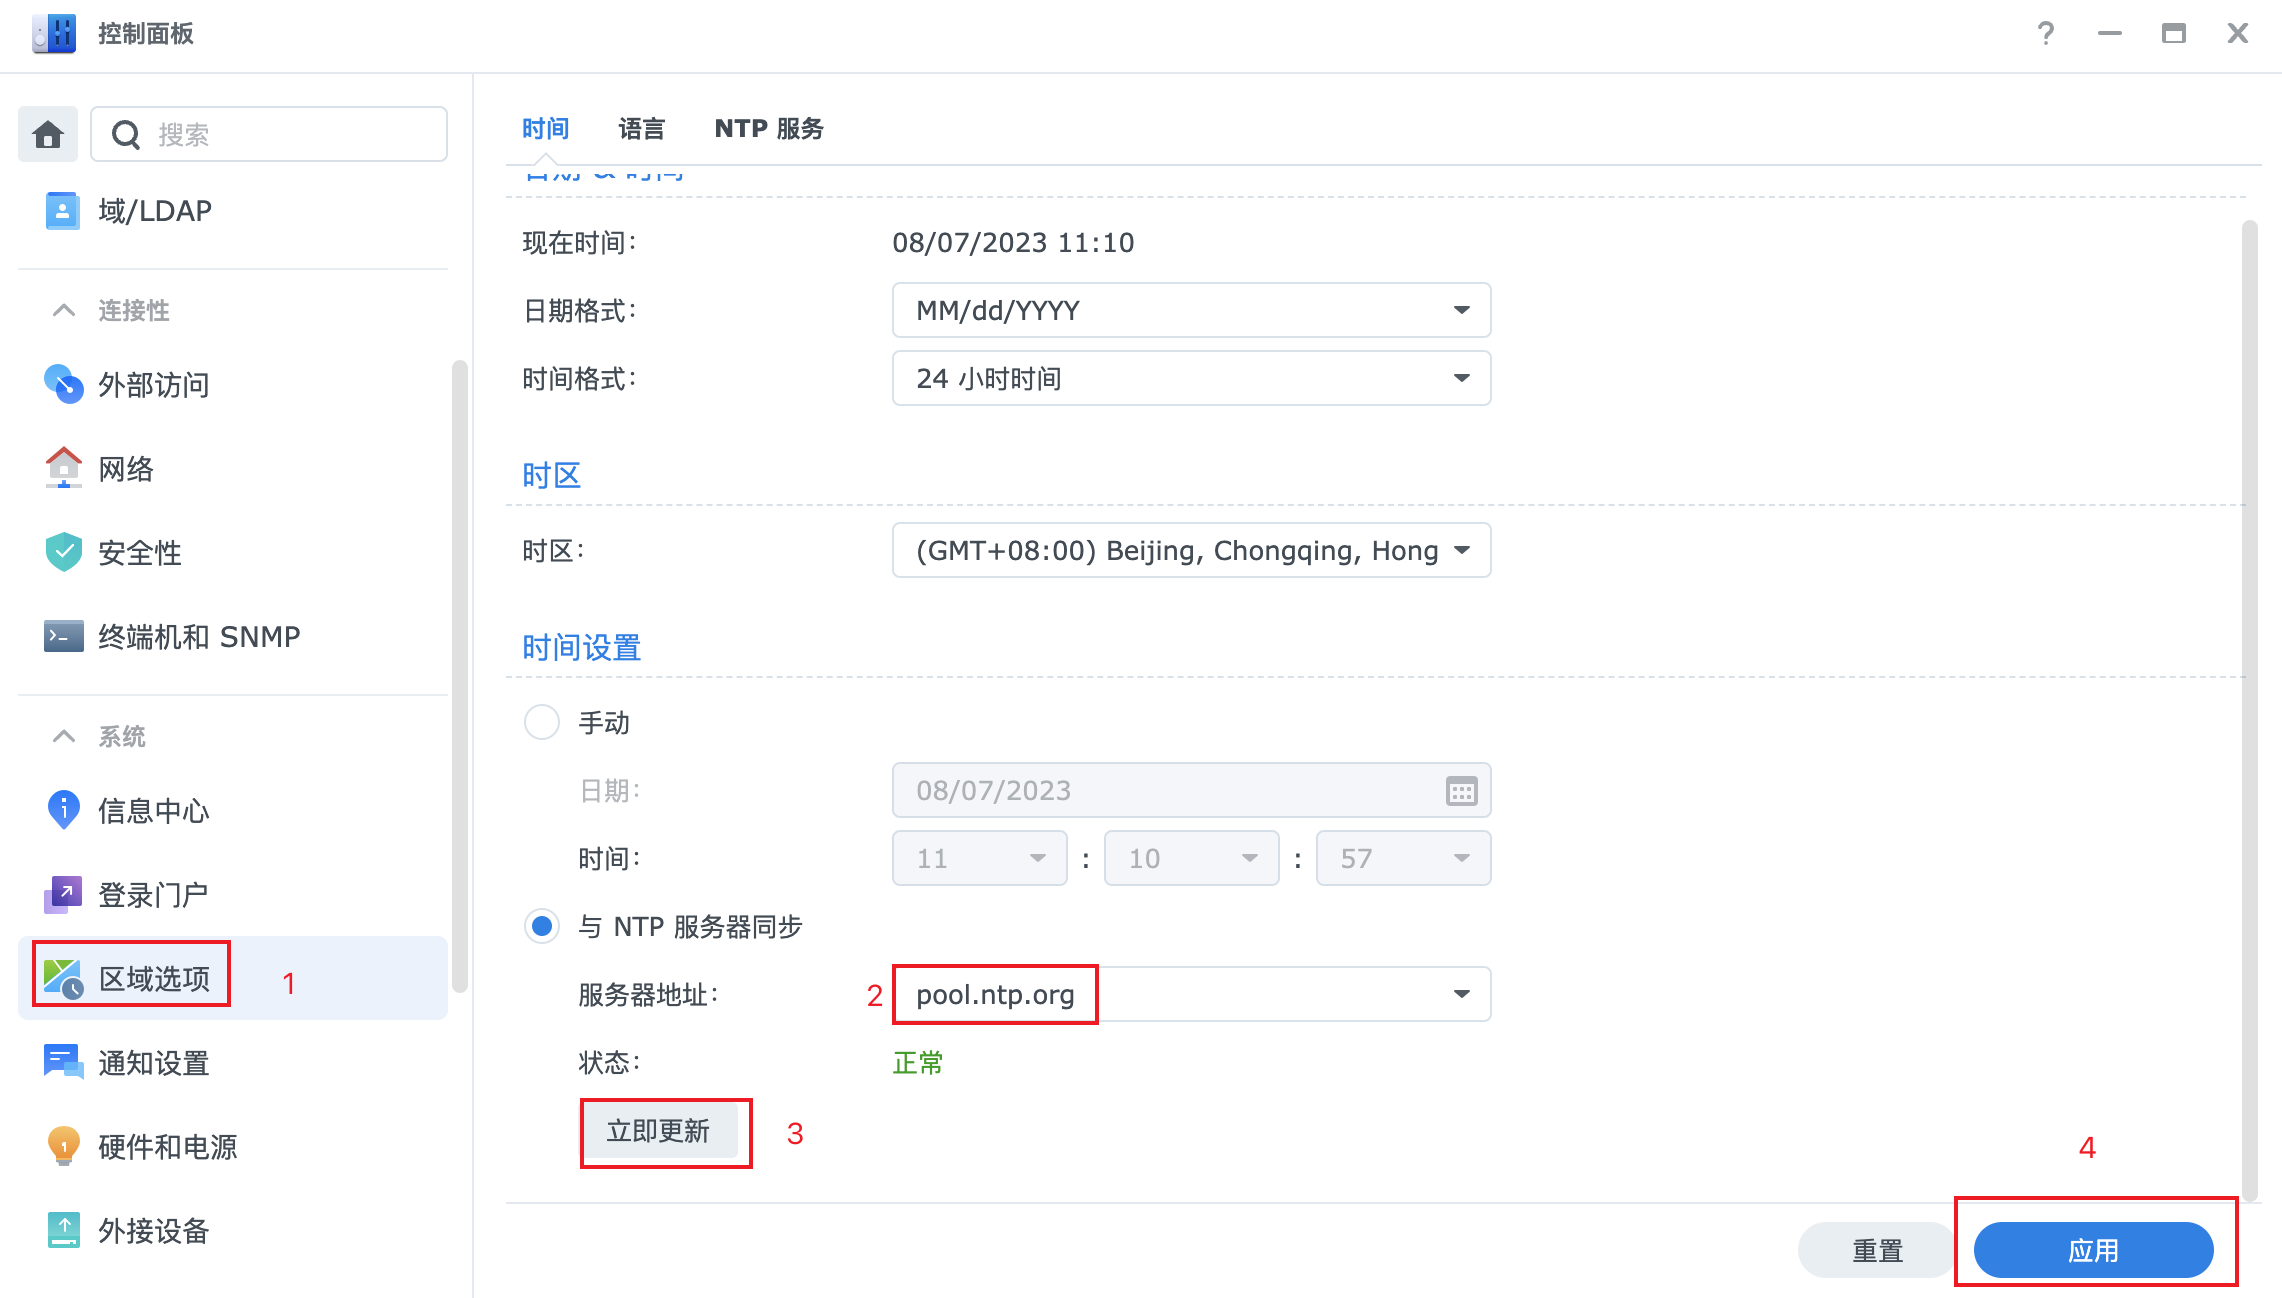
NTP服务开启方式看下图。

开启完NTP服务后,配置下时间设置。如下图
- 服务器地址选择
pool.ntp.org

然后我们开始新建目录吧。首先打开File Station,然后在docker目录下新建一个joplin目录。然后在joplin下新建一个data目录,再在data目录下新建一个postgres目录。最后目录结构如下所示。

然后打开Container Manager,点击项目,再点击新增。

填写项目名称,路径,和来源。
项目名称:你的项目名字,这里你就可以填写joplin路径:上面在docker目录下创建的joplin目录来源:选择创建 docker-compose.yml,然后把下面的配置信息粘贴上去。并且修改一下- APP_BASE_URL=http://<群晖内网IP>:22300,你只需要把<群晖内网IP>替换成你的群晖内网IP就可以了,比如我的群晖内网IP是192.168.2.225我这边就改成- APP_BASE_URL=http://192.168.2.225:22300就可以了。
# This is a sample docker-compose file that can be used to run Joplin Server
# along with a PostgreSQL server.
#
# Update the following fields in the stanza below:
#
# POSTGRES_USER
# POSTGRES_PASSWORD
# APP_BASE_URL
#
# APP_BASE_URL: This is the base public URL where the service will be running.
#	- If Joplin Server needs to be accessible over the internet, configure APP_BASE_URL as follows: https://example.com/joplin.
#	- If Joplin Server does not need to be accessible over the internet, set the the APP_BASE_URL to your server's hostname.
#     For Example: http://[hostname]:22300. The base URL can include the port.
# APP_PORT: The local port on which the Docker container will listen.
#	- This would typically be mapped to port to 443 (TLS) with a reverse proxy.
#	- If Joplin Server does not need to be accessible over the internet, the port can be mapped to 22300.

version: '3'

services:
    db:
        image: postgres:latest
        volumes:
            - ./data/postgres:/var/lib/postgresql/data
        restart: unless-stopped
        environment:
            - POSTGRES_PASSWORD=joplin
            - POSTGRES_USER=joplin
            - POSTGRES_DB=joplin
    app:
        image: joplin/server:latest
        depends_on:
            - db
        ports:
            - "22300:22300"
        restart: unless-stopped
        environment:
            - APP_PORT=22300
            - APP_BASE_URL=http://<群晖内网IP>:22300
            - DB_CLIENT=pg
            - POSTGRES_PASSWORD=joplin
            - POSTGRES_DATABASE=joplin
            - POSTGRES_USER=joplin
            - POSTGRES_PORT=5432
            - POSTGRES_HOST=db
然后点击下一步

继续点击下一步,不需要设置web station

最后点击完成

启动完成后,Container Manager的项目里面就会多了一个joplin的项目

点击进去看会发现里面有两个容器,一个joplin app,还有一个数据库的容器。

这个时候就说明joplin server已经部署好了,然后你就可以登陆了。
登陆
在浏览器中输入http://<群晖内网IP>:22300,比如我的群晖内网IP是192.168.2.225,我就可以访问http://192.168.2.225:22300访问Joplin server。
默认账号:admin@localhost
默认密码:admin

登陆后会要求你修改默认密码,按照提示修改密码,可以修改用户名,登陆邮箱地址,密码。

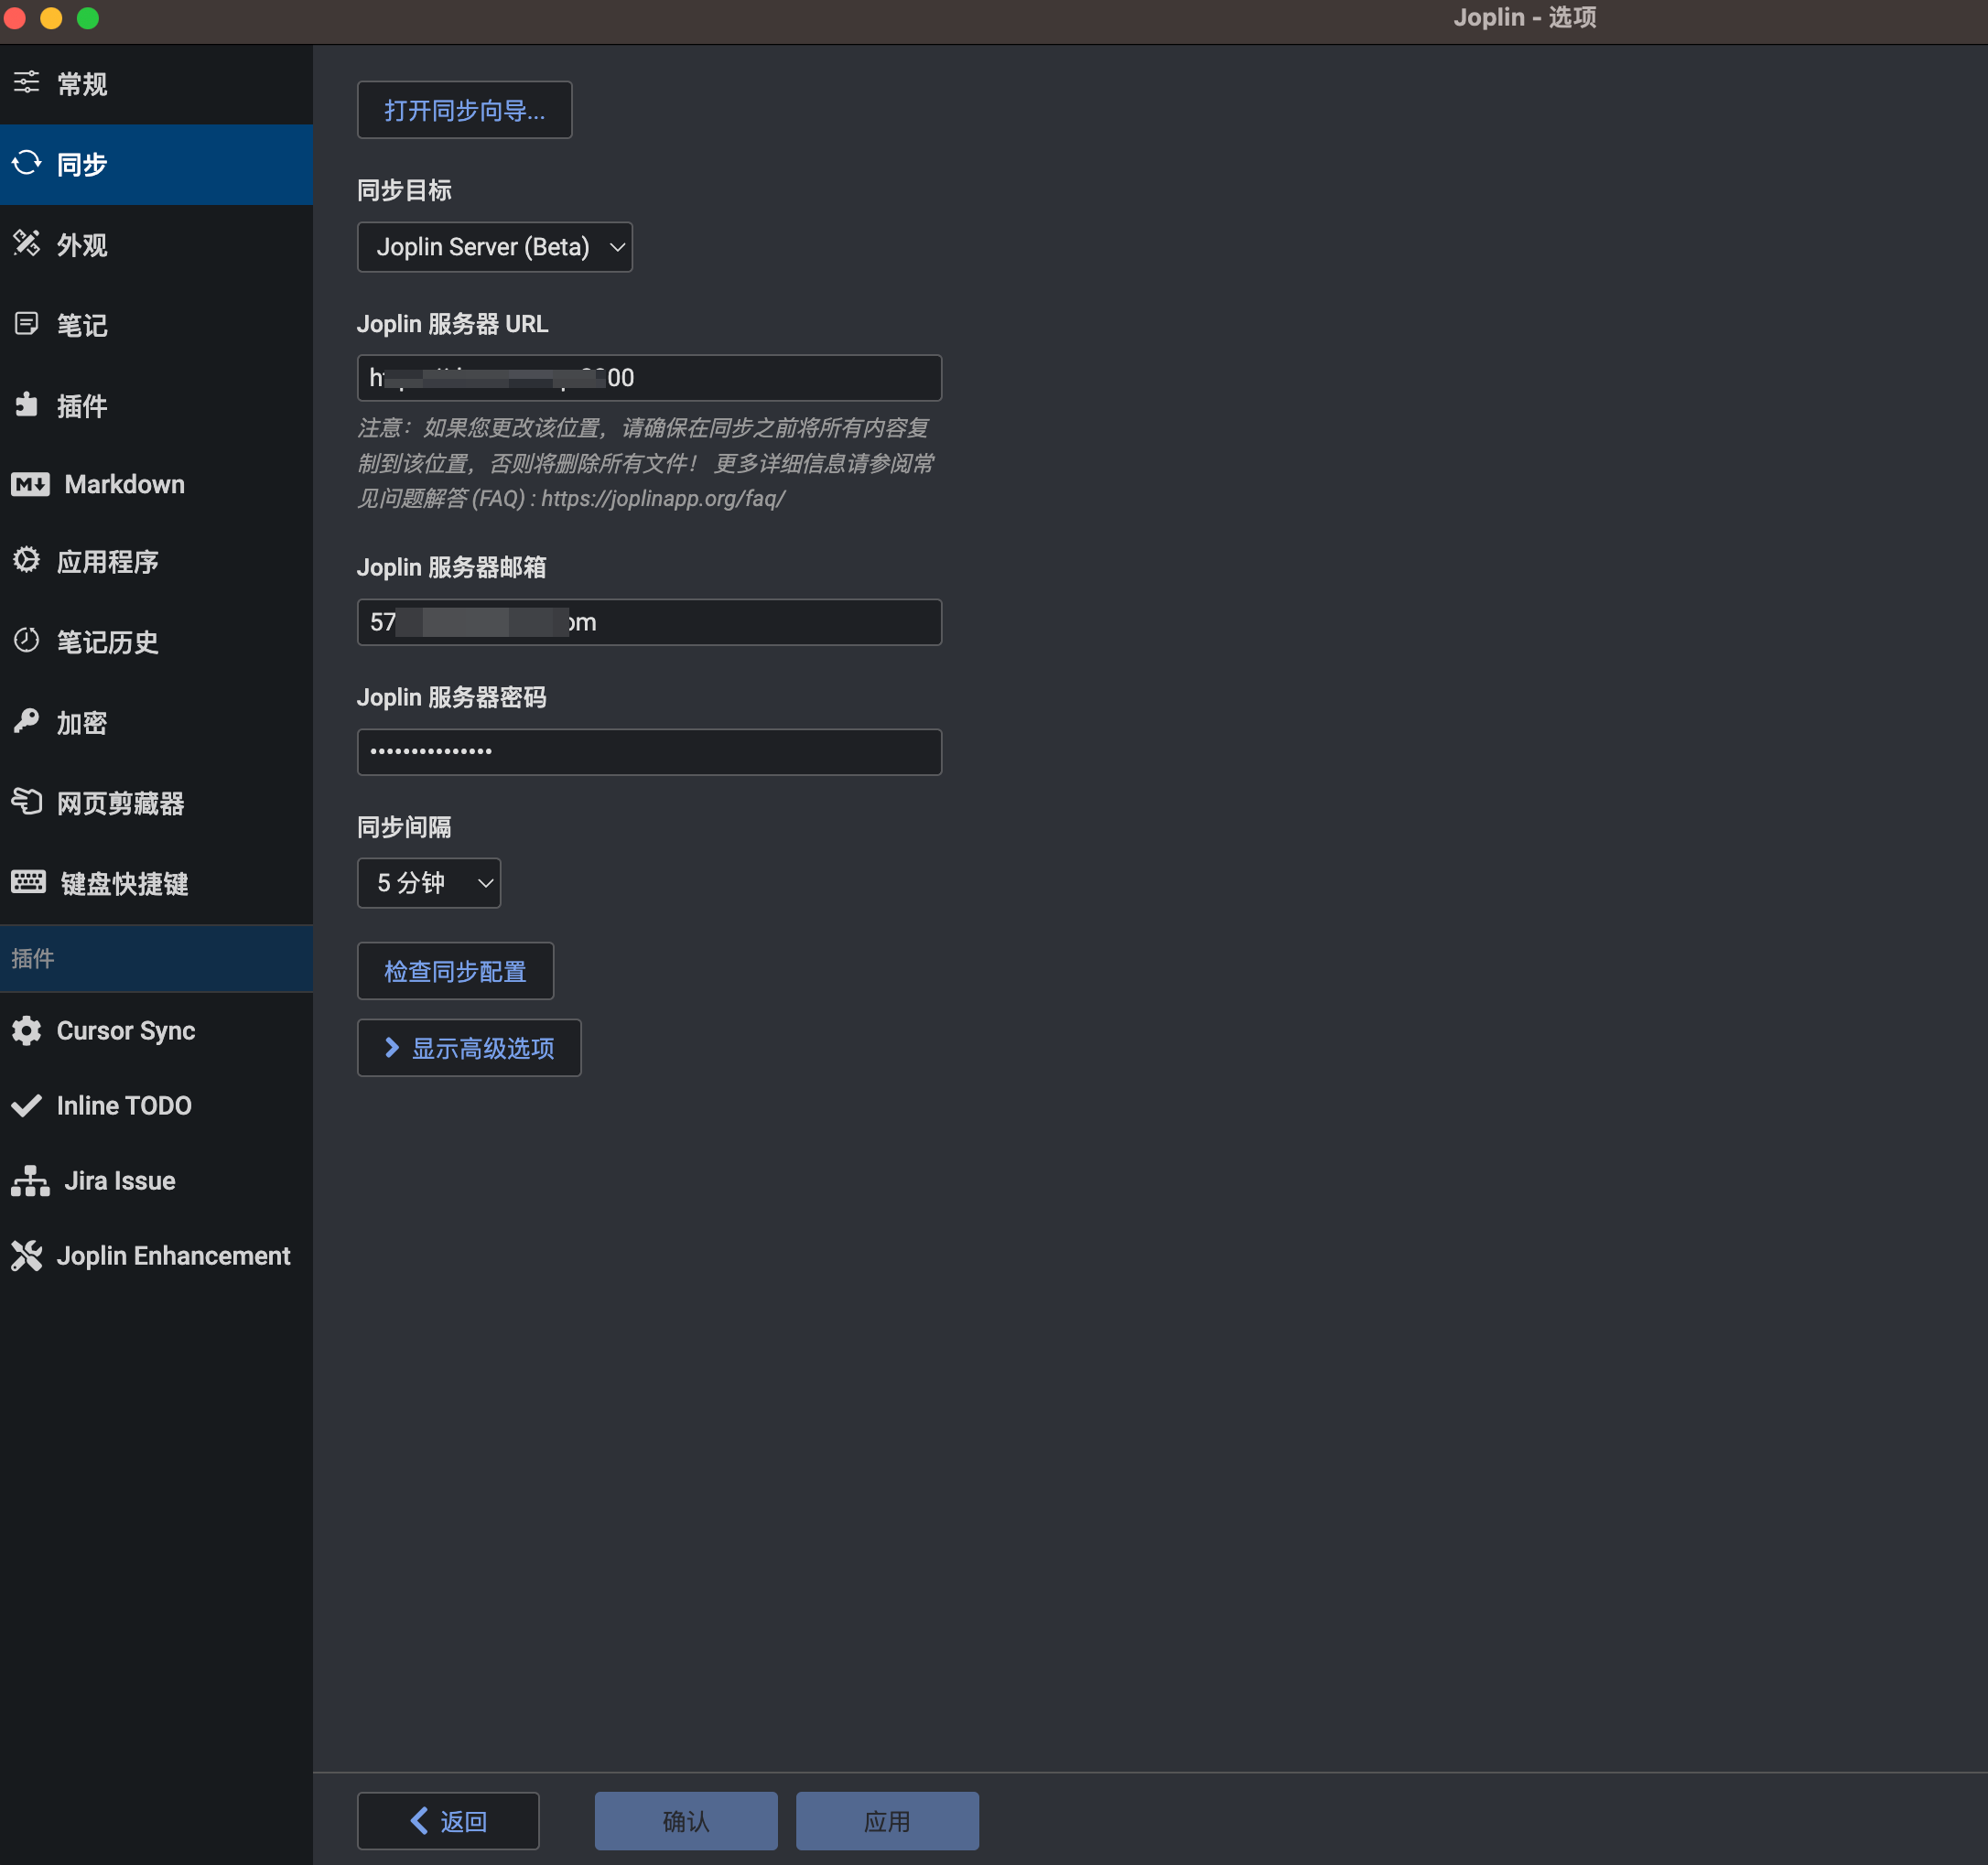
配置Joplin客户端
- 选择Joplin Server
- 输入Joplin Server的链接,与APP_BASE_URL的配置相同的地址
- 输入在Joplin Server网页端所配置的邮箱
- 输入在Joplin Server网页端所配置的密码
- 选择更新频率,默认为5分钟
- 点击检查配置,如果配置正确则配置完成

注意事项
Joplin Server仍然是Beta版本,故而可能存在不稳定的情况,所以在投入使用前,最好先进行一定时间的测试,避免数据的丢失!我所有的重要数据都做了snapshot备份。
- 感谢你赐予我前进的力量
-
 微信
微信  支付宝
支付宝